
Crayon roll
I love them they are so handy and make me look wayyy more organized than I am when I go out to a resterant to eat with C. Just toss a couple coloring pages in the bag and instant busy work while you wait for your food. They also make great gifts too!
Look how cute!!!

So I made up a little tutorial for you. My disclaimer I'm NOT a professional seamstress but more like a "enthusiastic hobbyist" :) hope this Tutorial helps you in some way. If you end up not wanting to sew one yourself I will be putting some in my Etsy store soon so go check them out. Here http://www.etsy.com/shop/playmommaplay
Skip to my lou has a fantastic tut here If you want more.
Here is my go at it!
I started out cutting 3 pieces of fabric and 1 piece of interfacing.

two pieces of fabric 5 X 16 1/2 and one piece of interfacing cut the same
One piece of 6X 16 1/2 fabric to fold in half for the pocket. You can use contrasting fabric like the ones above or all the same have fun with it its up to you.
I normally get iron on fusible interfacing but our local jo anns had a going out of business sale and sew in interfacing was all they had left sooo at this point sew or iron on your interfacing all along the wrong side of one of your 5X16 1/2 pieces.

Flip your fabric that you have just sewn your interfacing on over so the pattern side is up. Grab you 6 X 16 1/2" piece fold it and iron it in half. Put it on top of the 5 X 16 1/2 inch piece that has the interfacing on the back fold side towards the top.

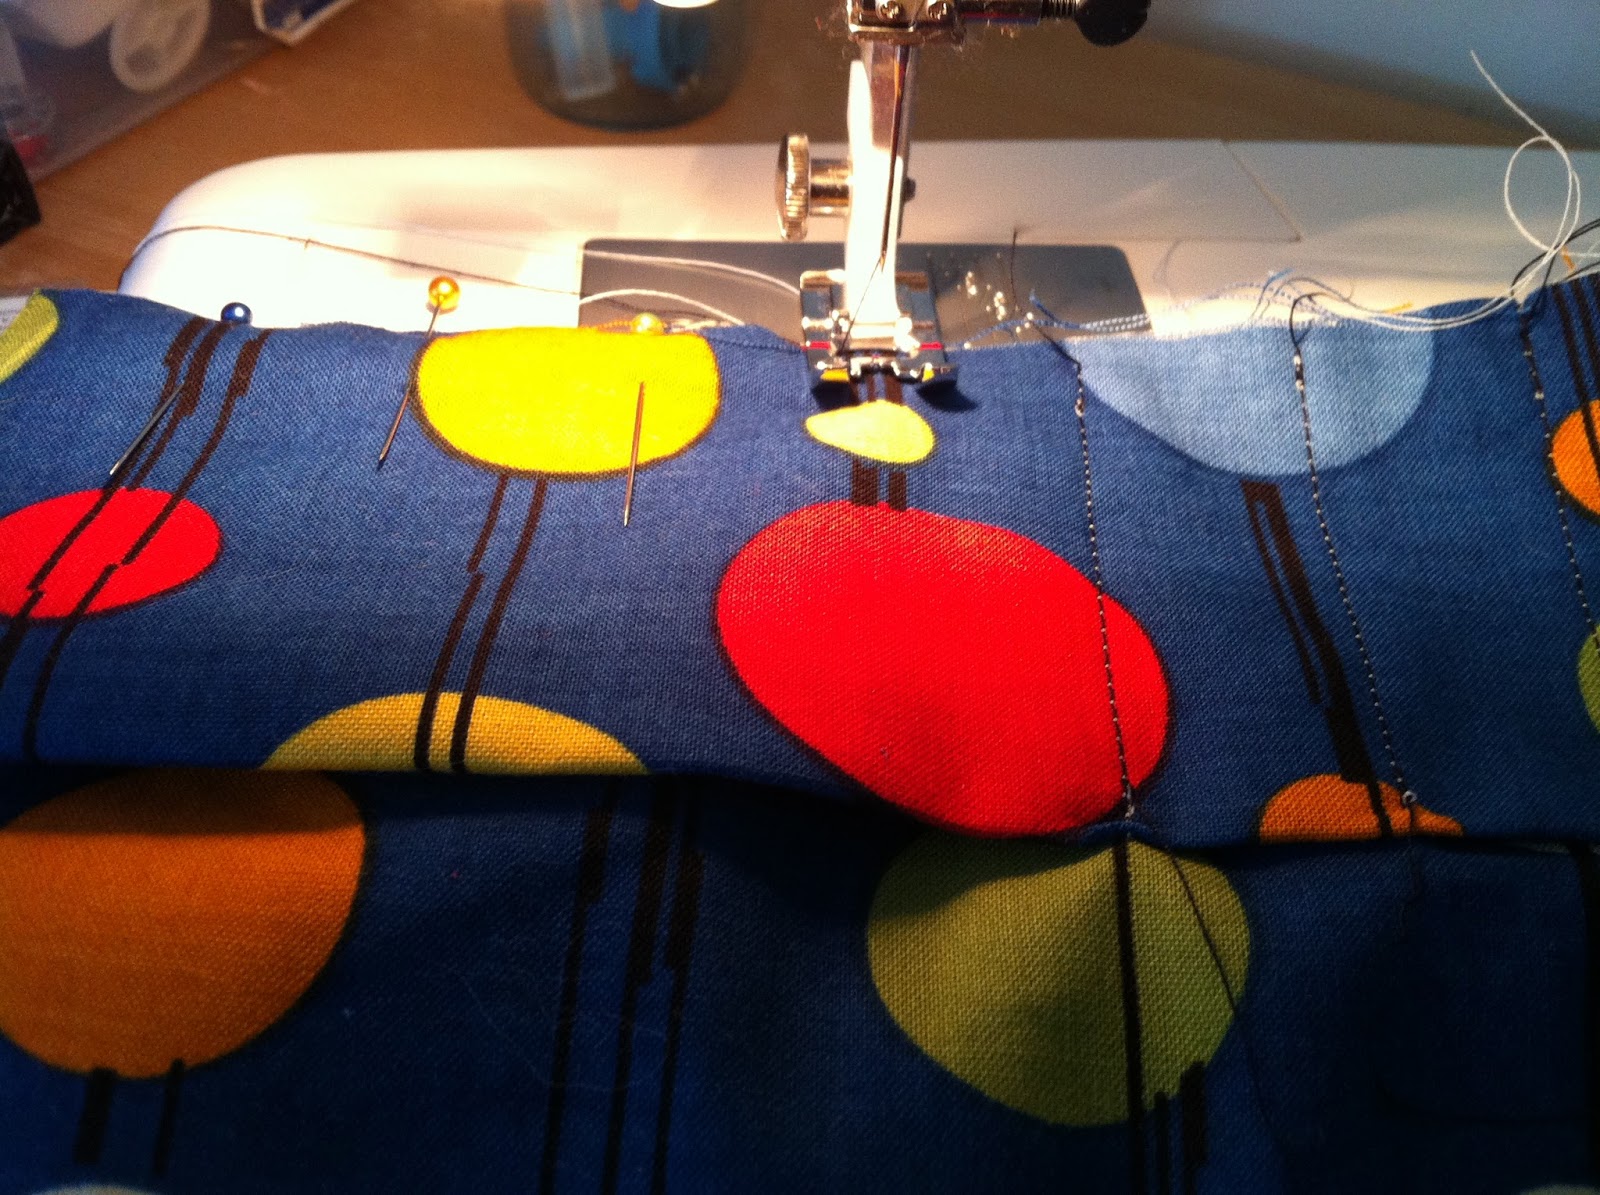
Sorry this next picture is upside down (its getting late tomorrows my birthday cut me some slack :P)
Anyway one tip I can give you that helped me get better rows was to pin a measuring tape onto the fabric. You sew a line down every inch so I placed a pin every inch. Be sure to back stitch at the top and bottom of the rows for extra strength.


Place the other 5X 16 1/2 piece face down You can also pin your ribbon or elastic to the inside as well at this point. pin and sew around the edges 1/4 inch seam allowance. Leave a 2 inch opening at the bottom for turning. Turn press and top stich .

No comments:
Post a Comment